What is a VPN DNS leak? How to check, fix, and prevent it



A VPN Domain Name System (DNS) leak happens when a device connected to a VPN sends DNS requests outside the VPN’s encrypted tunnel.
DNS translates website names like expressvpn.com into the IP addresses devices use to reach them. When DNS requests leak, the internet service provider (ISP) or another DNS provider can see which websites are being visited, even though the VPN shows as connected and the rest of the traffic stays protected.
ExpressVPN helps prevent these leaks by sending DNS requests through its encrypted tunnel to its own private DNS servers by default. If the VPN connection drops, Internet Kill Switch blocks DNS requests and other traffic until it reconnects. Our DNS leak test shows whether this is working and what to check if it isn’t.
What causes DNS leaks, and how ExpressVPN prevents them
A DNS leak can happen for a few reasons, so fixing it may take a little trial and error.
VPN sends DNS requests outside the tunnel
When you use a VPN, your internet traffic is meant to be encrypted and routed through a secure tunnel that hides your activity from your ISP or local network. But sometimes, DNS requests bypass that tunnel and get handled by your ISP instead.
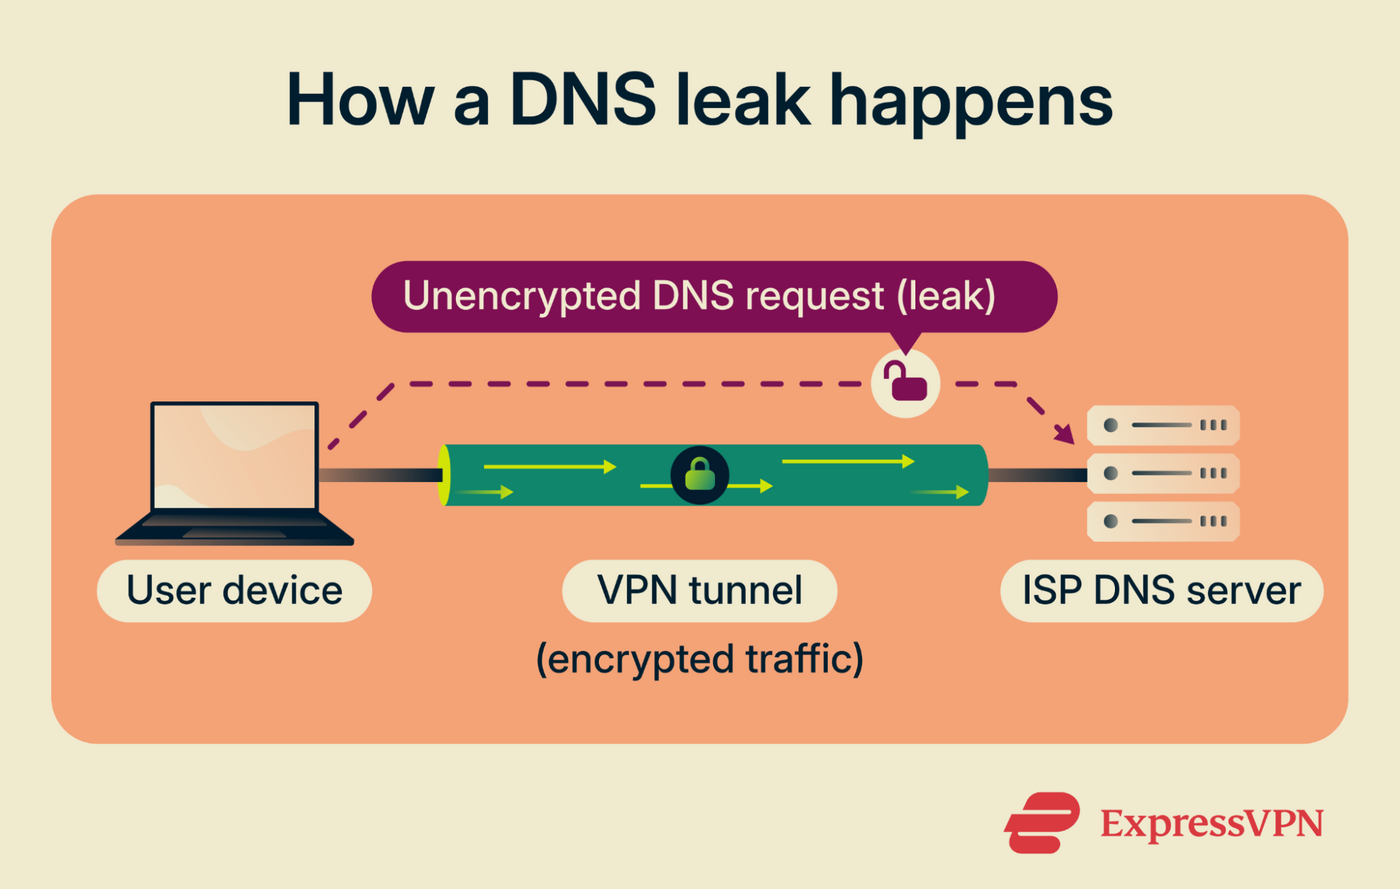
When you connect, the ExpressVPN app sends DNS requests through the encrypted tunnel to our private DNS, which runs on every VPN server. The requests aren’t passed to a third-party DNS provider, and we don’t log them. Our no-logs policy has been independently audited.
However, other software on the device can still override this. For example, some antivirus apps with DNS filtering make the device use a different DNS server.
DNS requests go out over IPv6
Internet connections can use IPv4, IPv6, or both. These are two versions of the system that assigns addresses to devices and routes traffic between them. If a VPN only handles IPv4 and the connection also supports IPv6, DNS requests sent over IPv6 can bypass the tunnel and reach the ISP.
ExpressVPN’s apps include IPv6 leak protection, which blocks IPv6 traffic to prevent this type of leak.
VPN disconnects unexpectedly
A VPN connection can drop when your device wakes from sleep or switches networks. Without a kill switch, your device can send DNS requests over its regular internet connection before the VPN reconnects.
ExpressVPN’s Internet Kill Switch blocks internet traffic, including DNS requests, if the VPN drops unexpectedly. It’s on by default, and you can switch to a stricter setting. The options differ between desktop and mobile apps.
Desktop apps
On Windows, macOS, and Linux, the settings are:
-
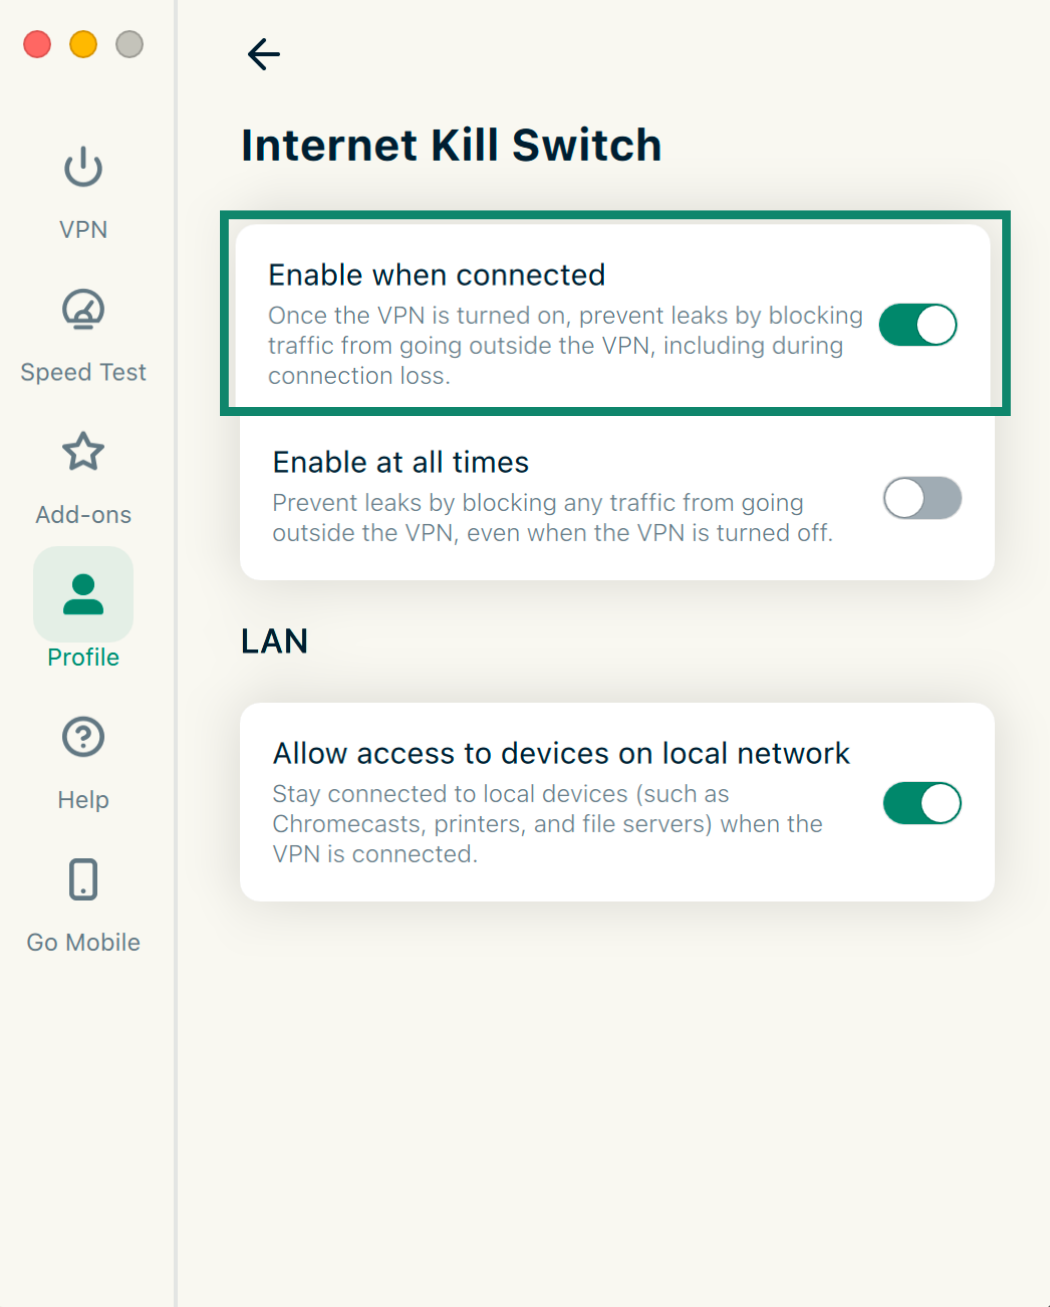
Enable when connected: Protects against unexpected disconnections. Internet access resumes if you disconnect the VPN yourself.
-
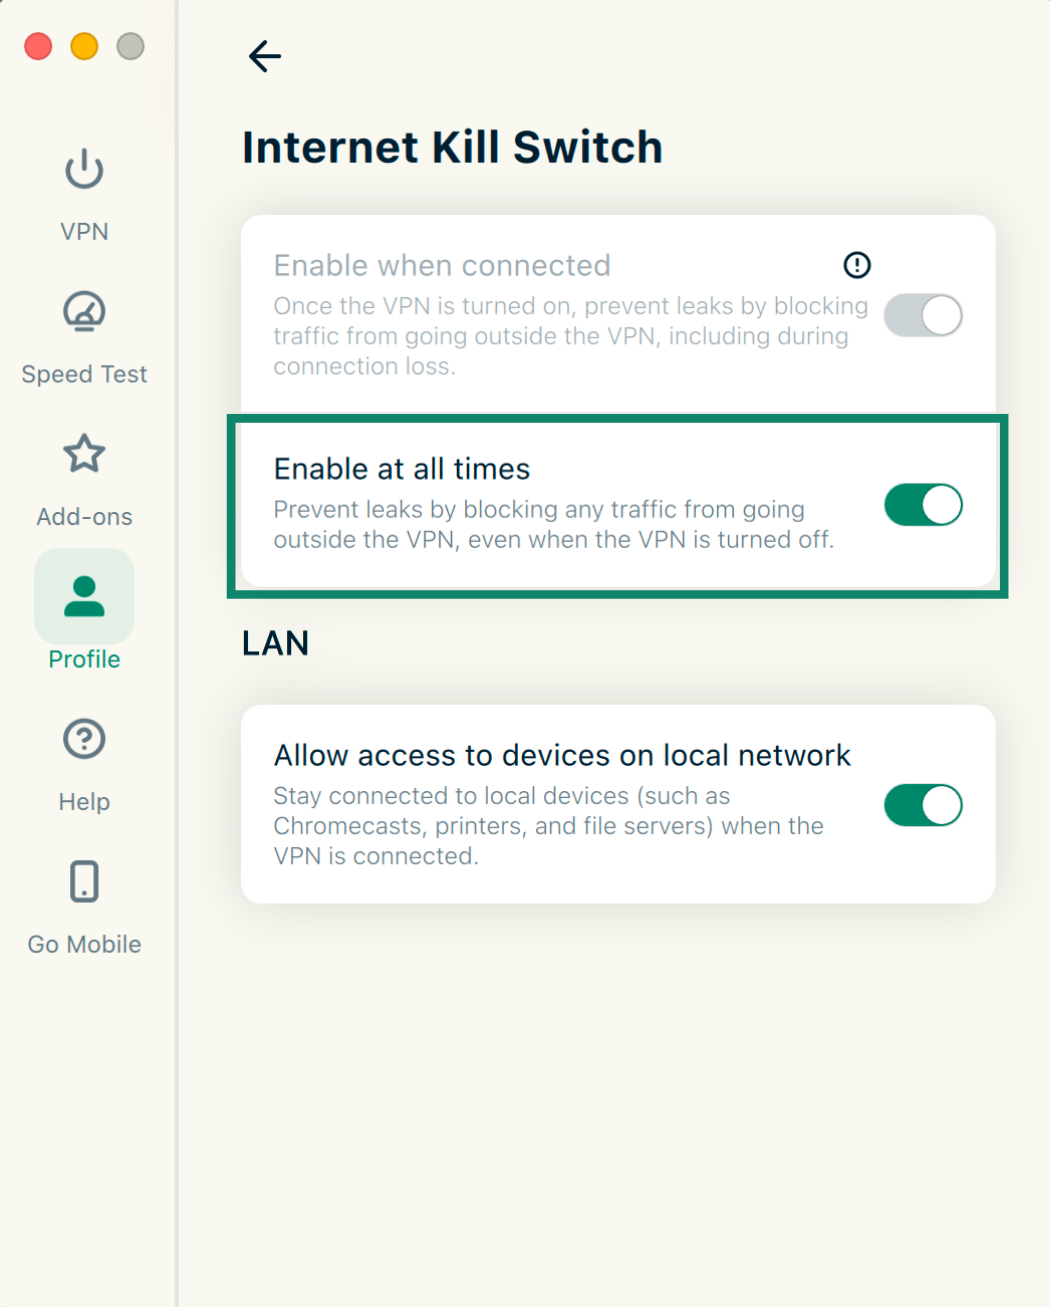
Enable at all times: Blocks internet access whenever the VPN is disconnected, including after you disconnect it yourself.
To check or change these settings:
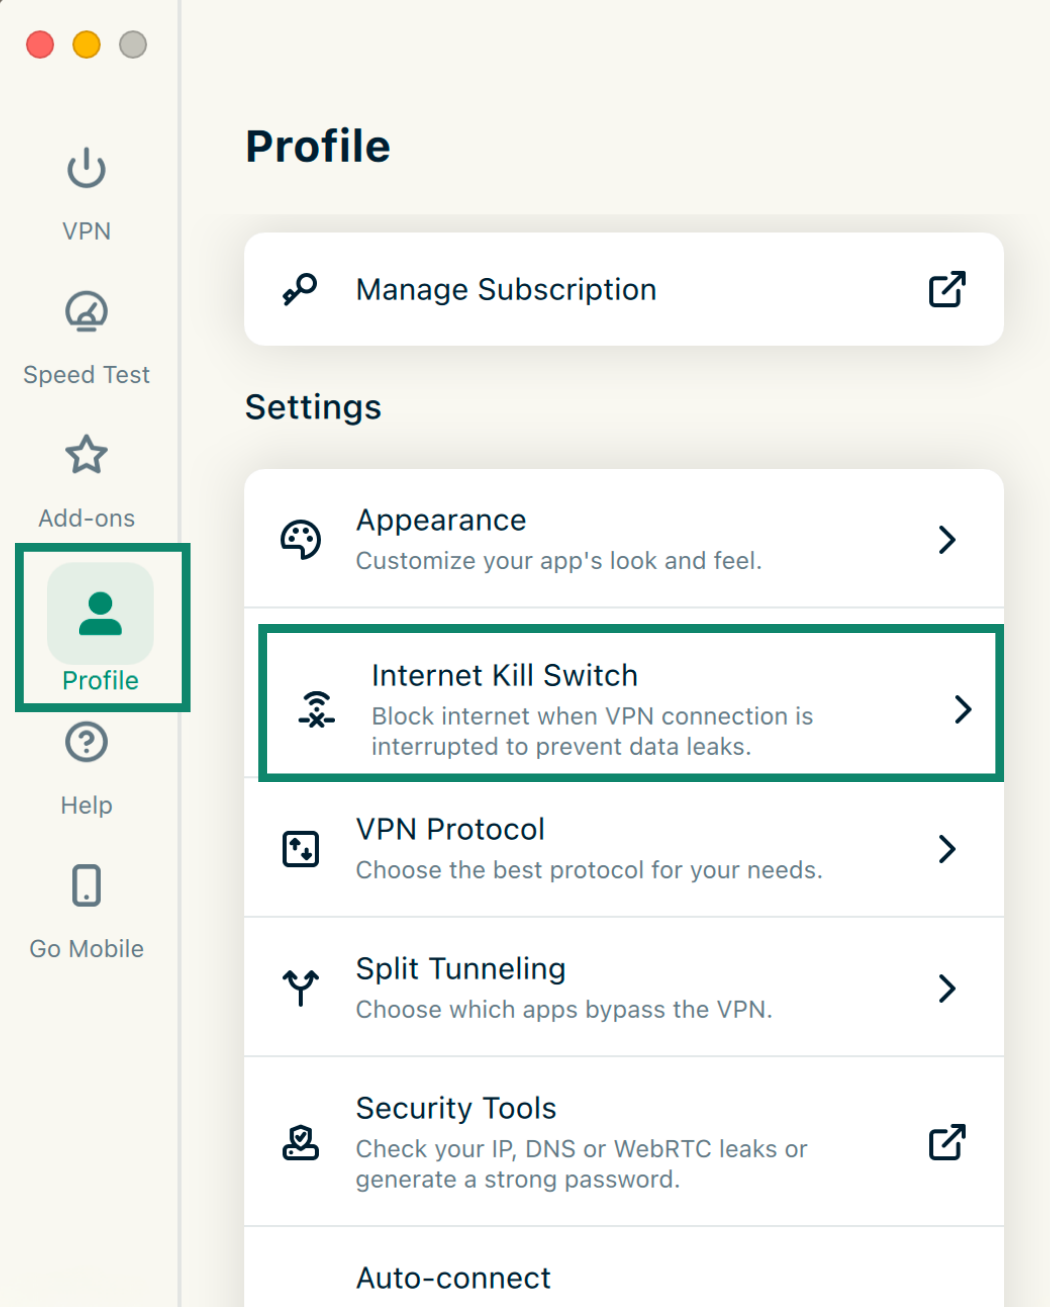
- Open the Profile tab, then select Internet Kill Switch under Settings.
- Check that Enable when connected is on.
- For protection whenever the VPN is off, turn on Enable at all times.
iOS and iPad
On iPhone and iPad, the default Standard Kill Switch blocks internet traffic during an unexpected disconnection. The Advanced Kill Switch blocks all network traffic, not only internet traffic. Neither setting blocks internet access after you disconnect the VPN yourself.
To switch to the Advanced Kill Switch:
- Tap Profile > Internet Kill Switch.
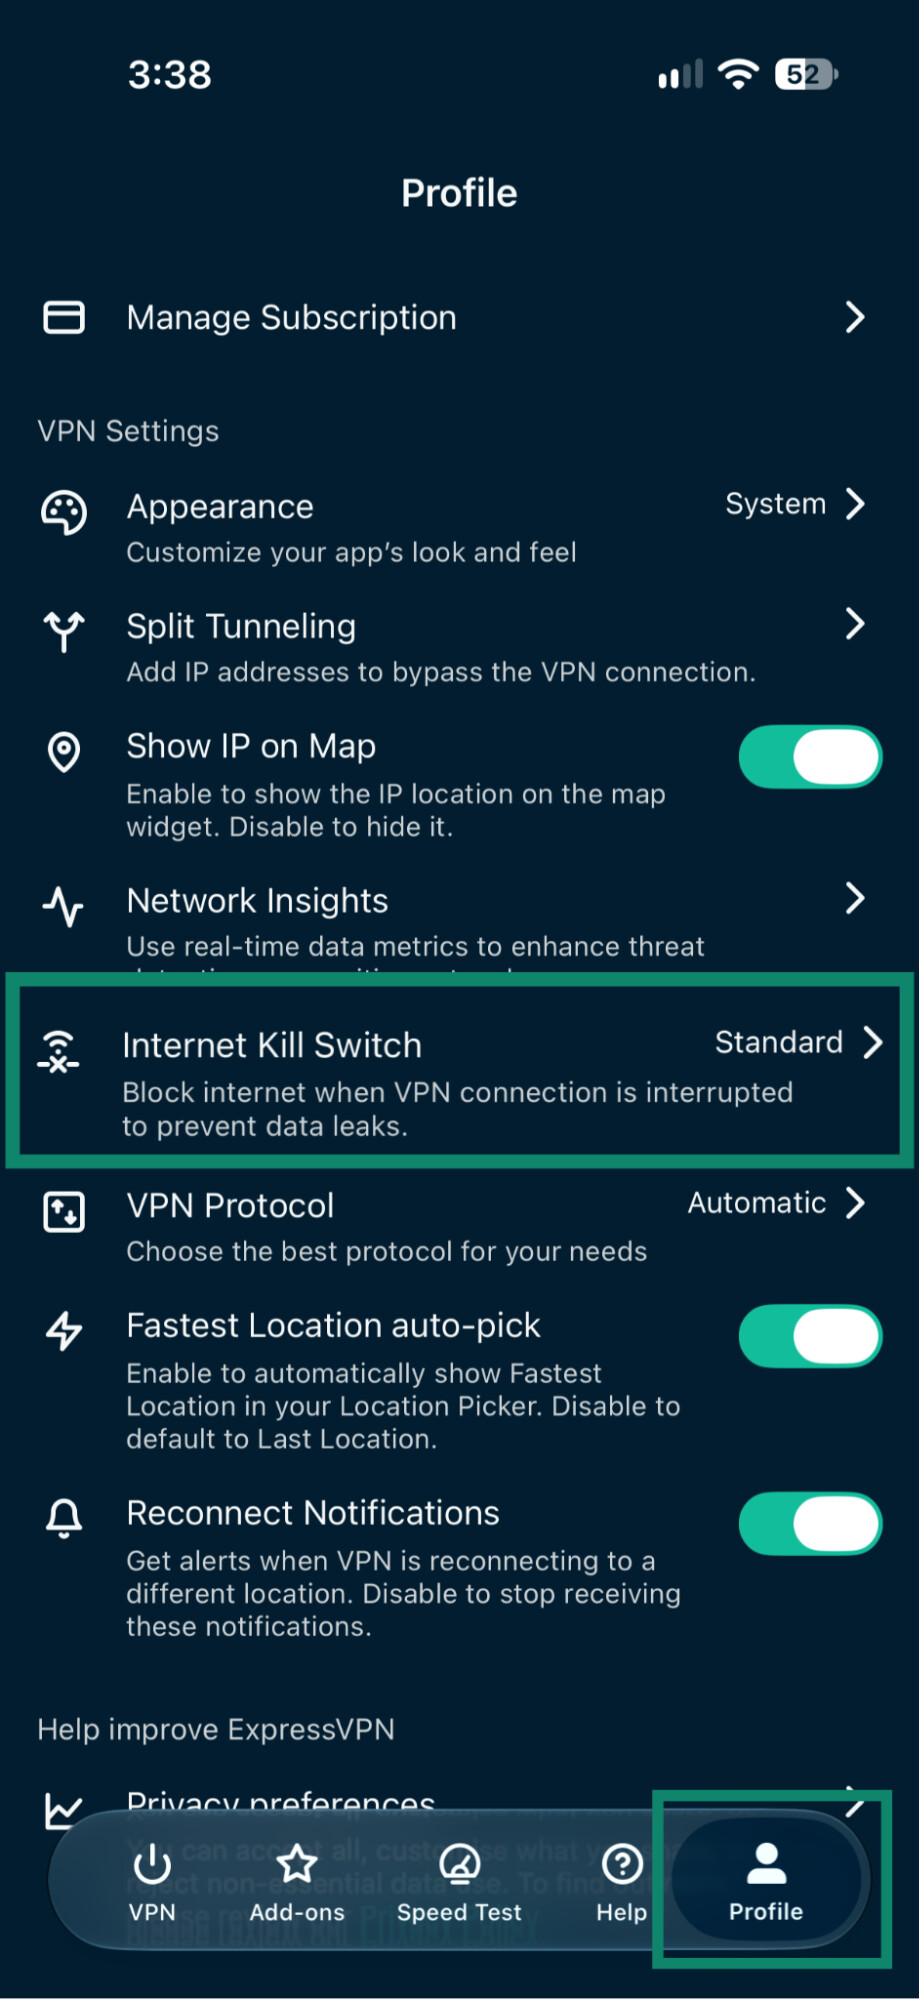
- Tap Advanced Kill Switch and confirm with Change Anyway.
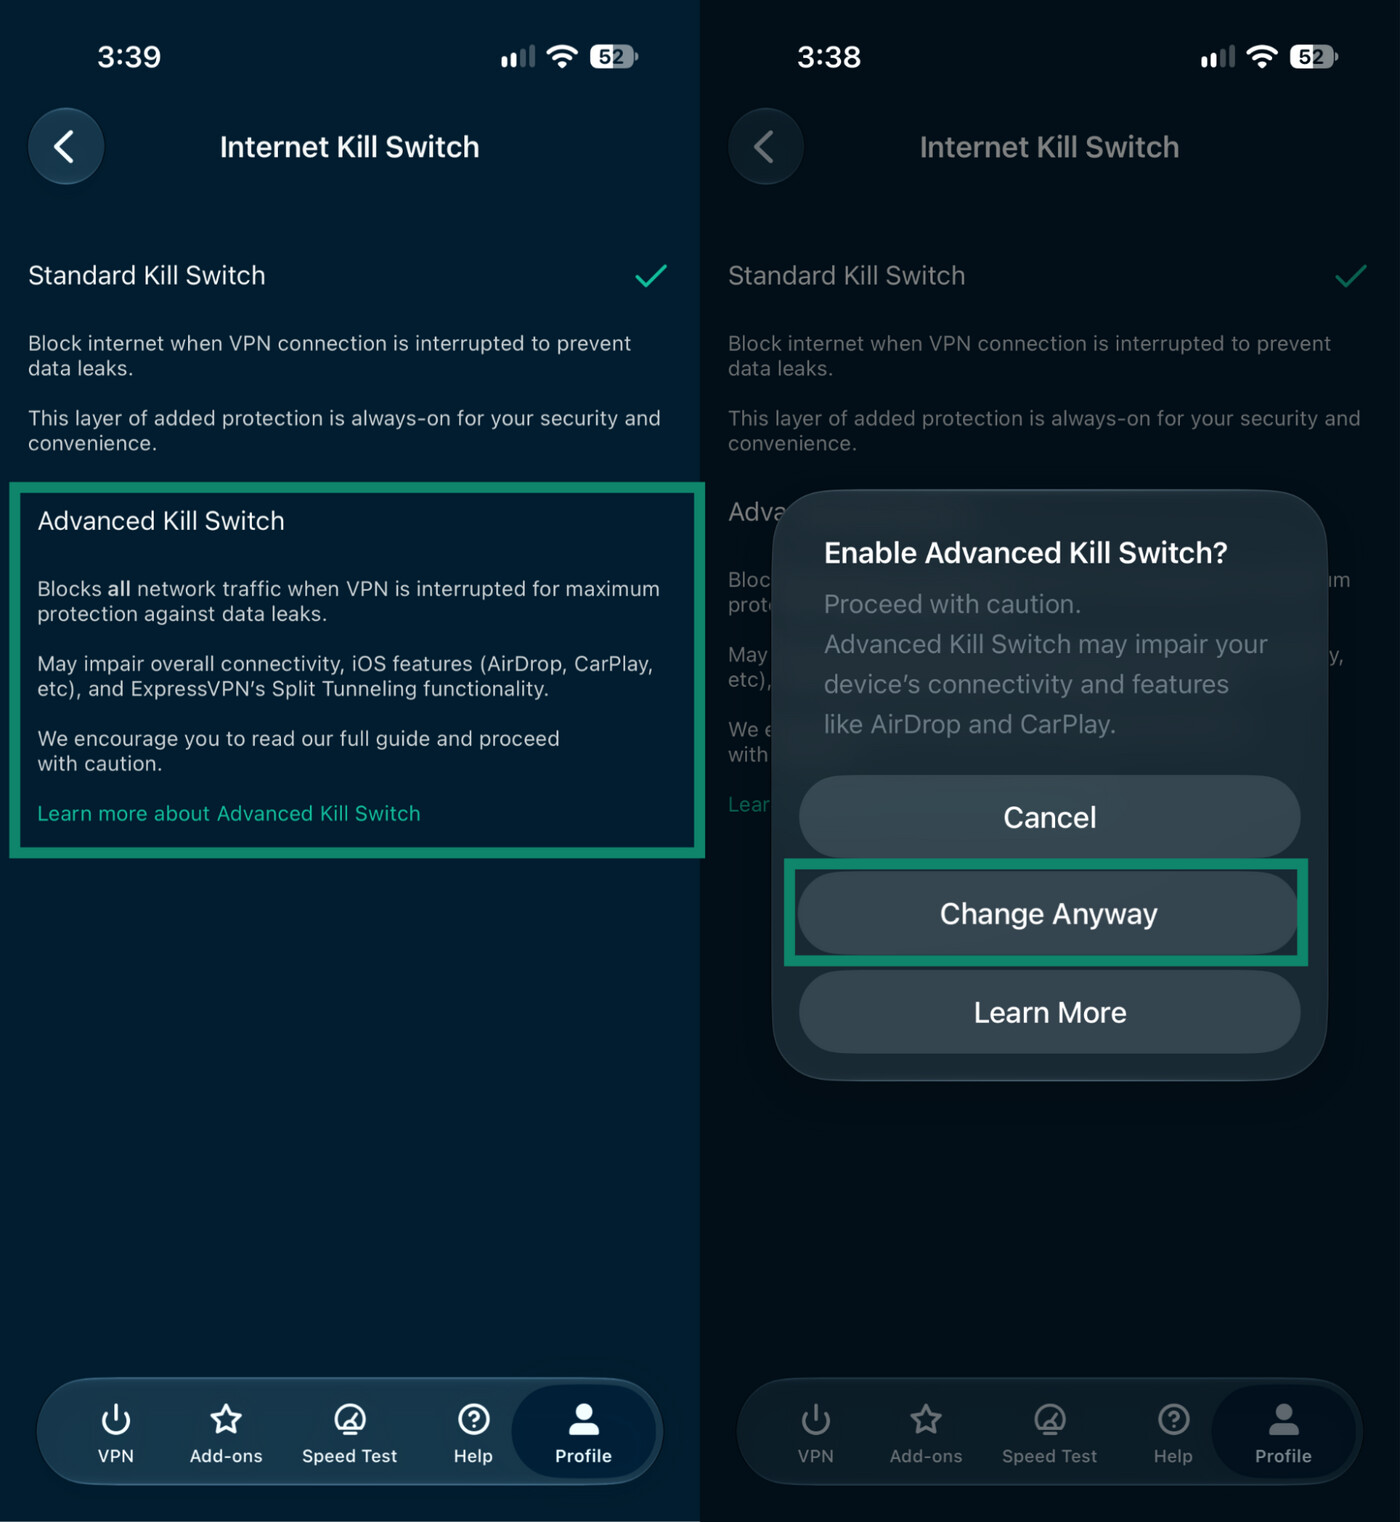
Advanced protection can affect features such as AirDrop and CarPlay. Check the iOS kill switch guide for details before enabling it.
Android
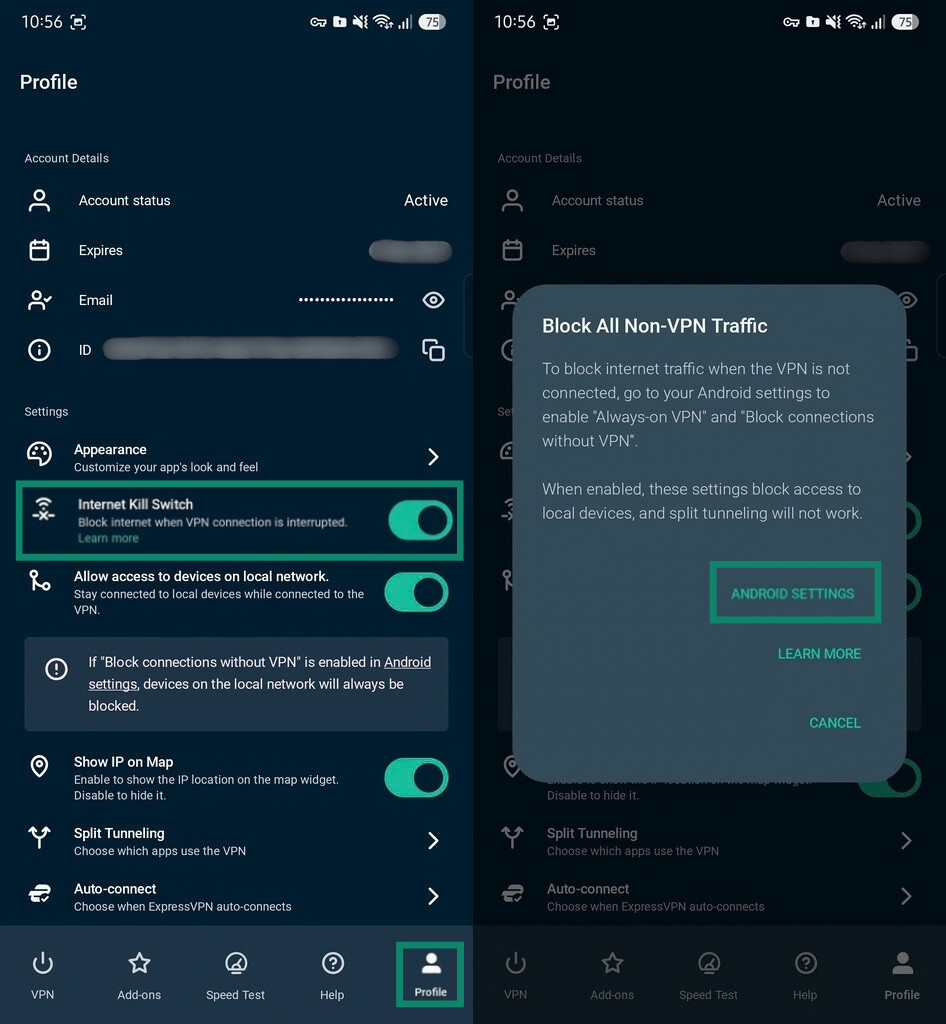
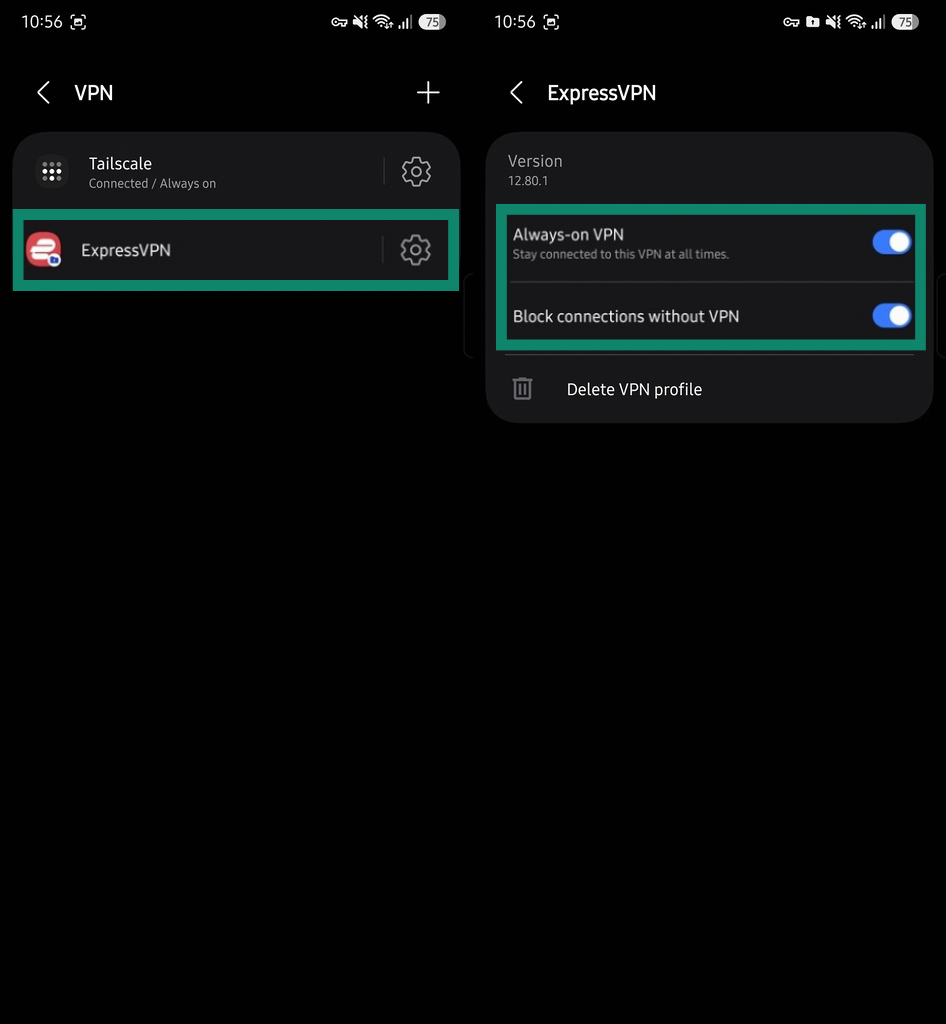
The advanced option on Android works a bit differently: it’s a system-level kill switch, enabled through Android’s own settings rather than the app, and it blocks all internet traffic that isn’t routed through the VPN, even after the VPN has disconnected.
- To turn it on, tap Profile, then under Internet Kill Switch, tap Learn more, and select Android Settings.
- Tap the cog icon next to ExpressVPN, and toggle on both Always-on VPN and Block connections without VPN.
Want to keep your DNS requests private?
ExpressVPN routes your DNS requests through its encrypted VPN tunnel to its own private DNS servers, helping prevent DNS leaks that could expose the websites you visit to your ISP or local network.
Avoid DNS leaks with ExpressVPN
Try ExpressVPN with a 30-day money-back guarantee for new users.
Browser or security app settings override ExpressVPN’s DNS
A browser’s DNS over HTTPS (DoH) setting, often labeled "secure DNS," can send DNS requests to another provider, such as Cloudflare, instead of ExpressVPN’s DNS servers. The requests still travel through the VPN tunnel, so the ISP can’t see them, but that provider handles them instead of ExpressVPN. A DNS leak test then shows the other provider, which looks like a leak. Turning off DoH in the browser sends DNS requests back to ExpressVPN.
Some antivirus and security apps work differently. On Windows and Mac, their DNS or web filtering features may stop the device from using ExpressVPN’s DNS servers, which can cause a real DNS leak. ExpressVPN’s Support guides for Windows and macOS explain how to fix this.
How to test ExpressVPN for DNS leaks
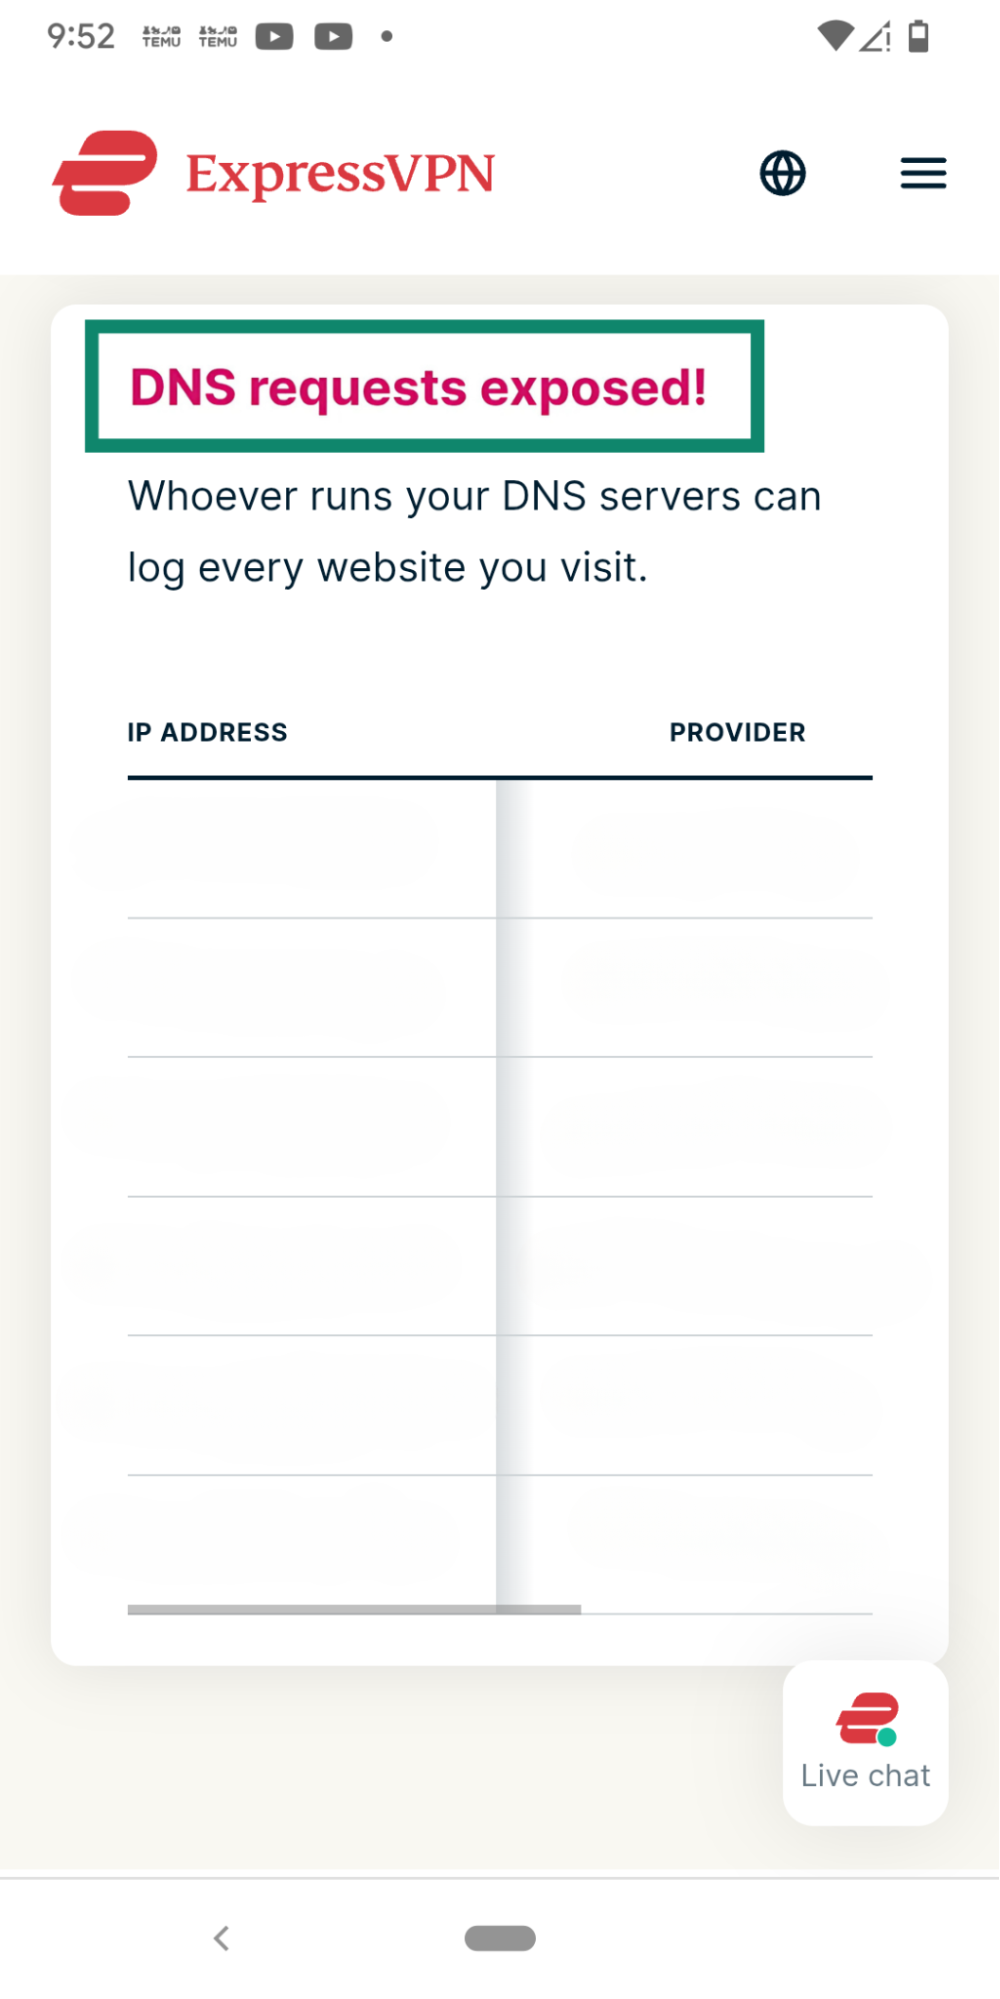
Our DNS Leak Test shows which DNS servers handle your browser’s requests. Comparing results before and after connecting helps you check whether the browser is using ExpressVPN’s DNS. Use your usual browser, since its DNS settings can affect the result.
Steps 1 and 2 show which DNS servers your device uses without the VPN. If "Enable at all times" (desktop) or "Block connections without VPN" (Android) is on, the test page won’t load while the VPN is disconnected. In that case, skip to step 3.
- Open the ExpressVPN app and disconnect from the VPN.
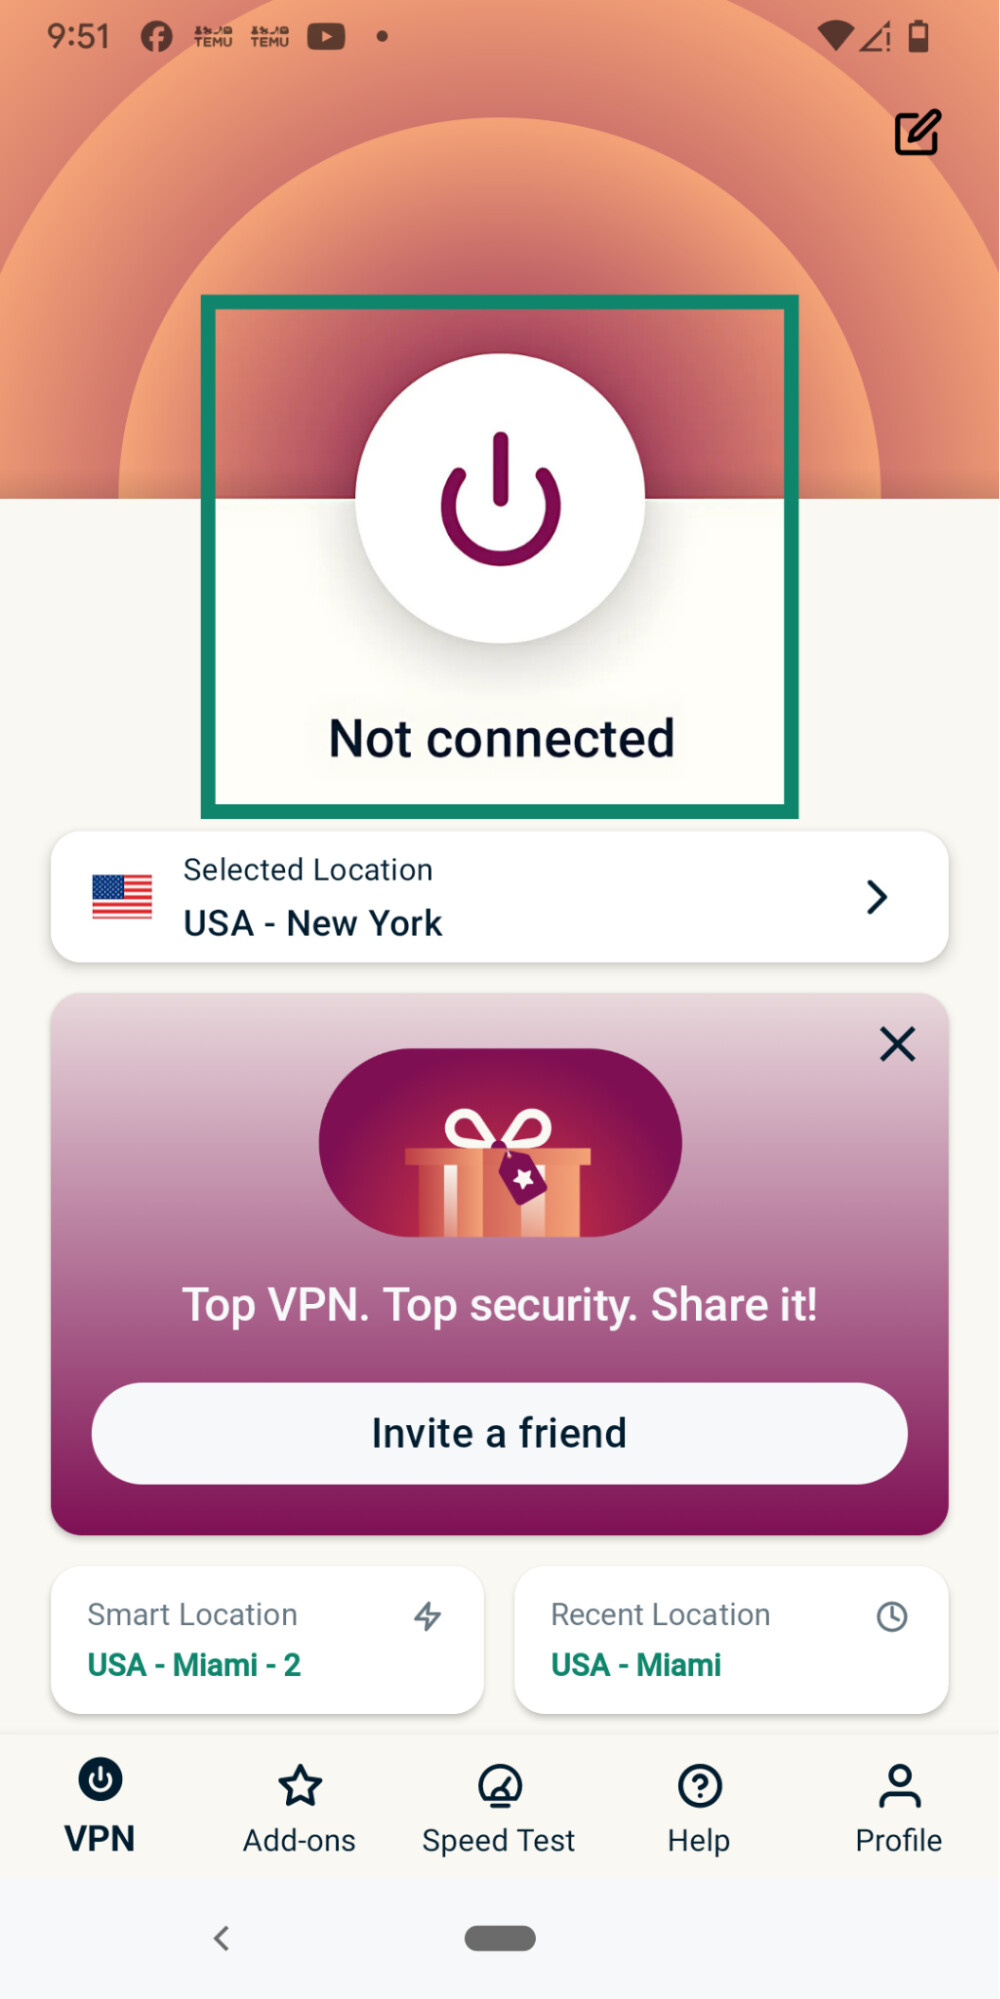
- Run the DNS leak test and note the server IP addresses and providers listed.
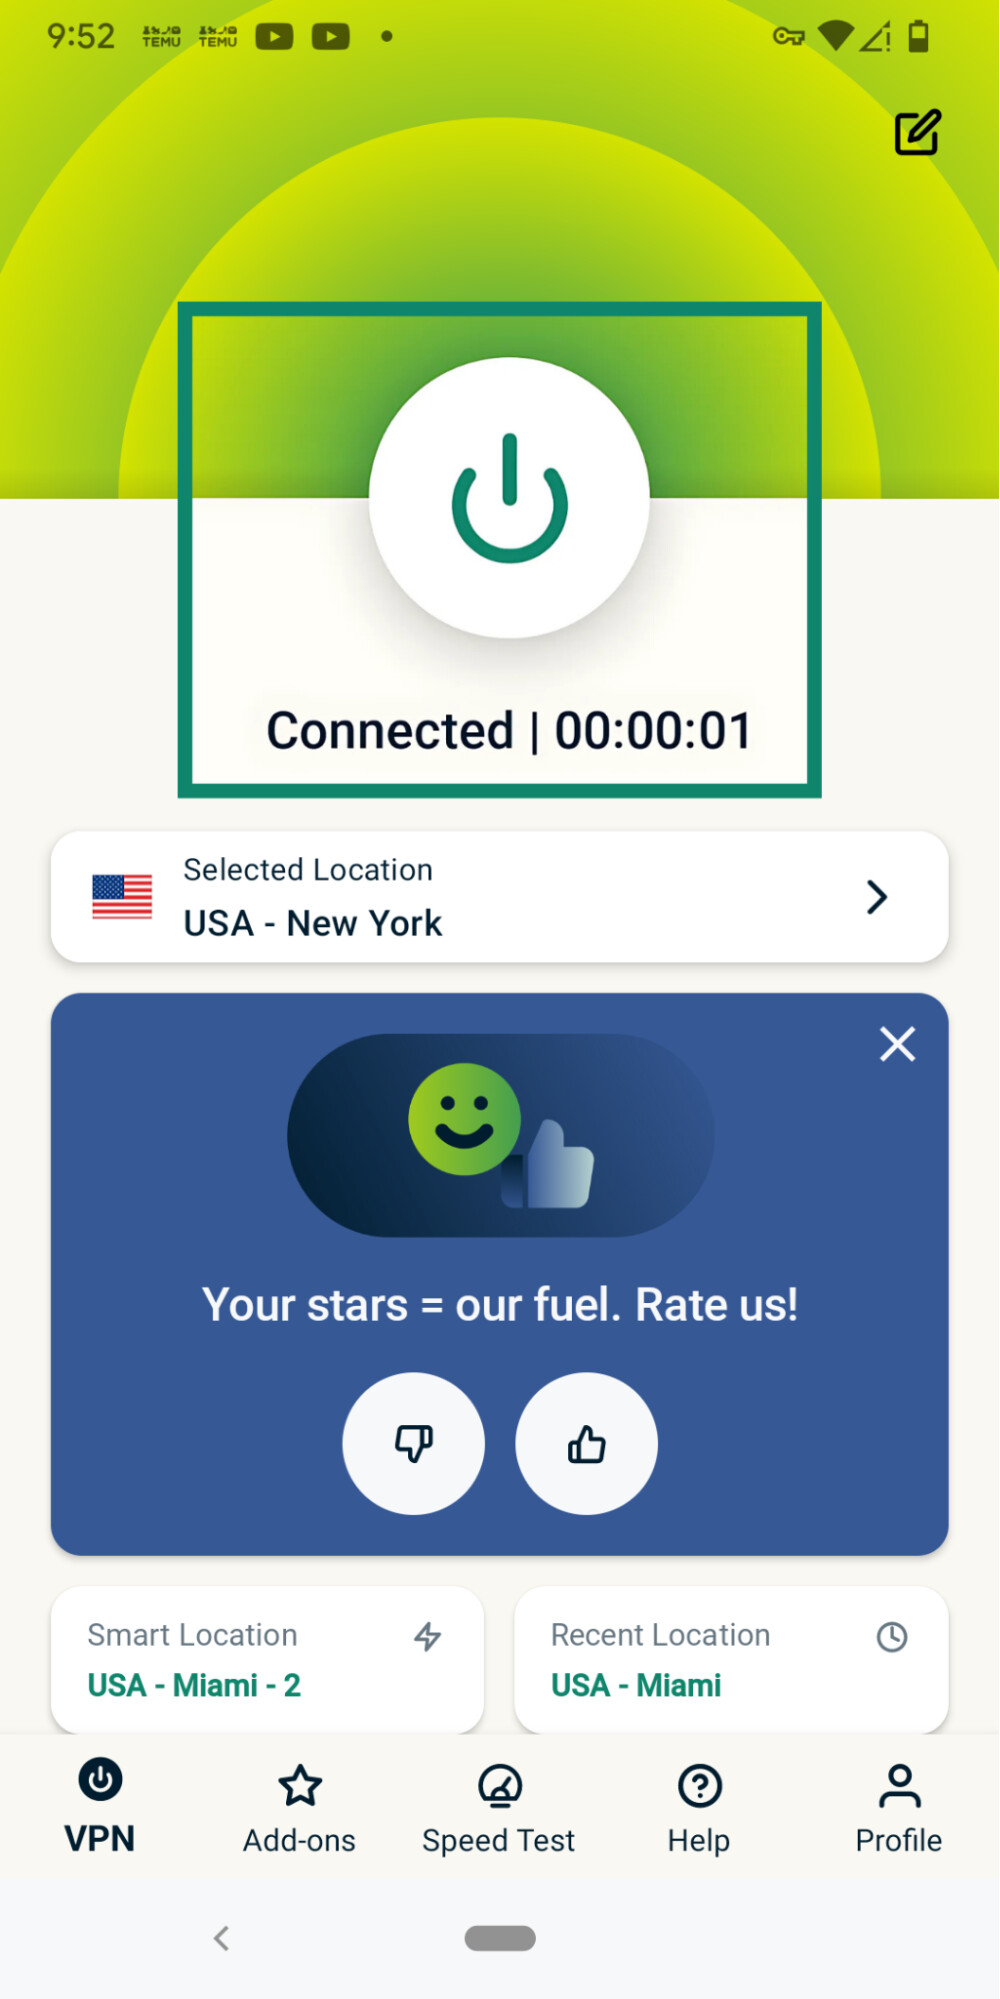
- Connect to any server location and wait until the app shows you’re connected.
- Refresh the test page in the same browser and compare the results.
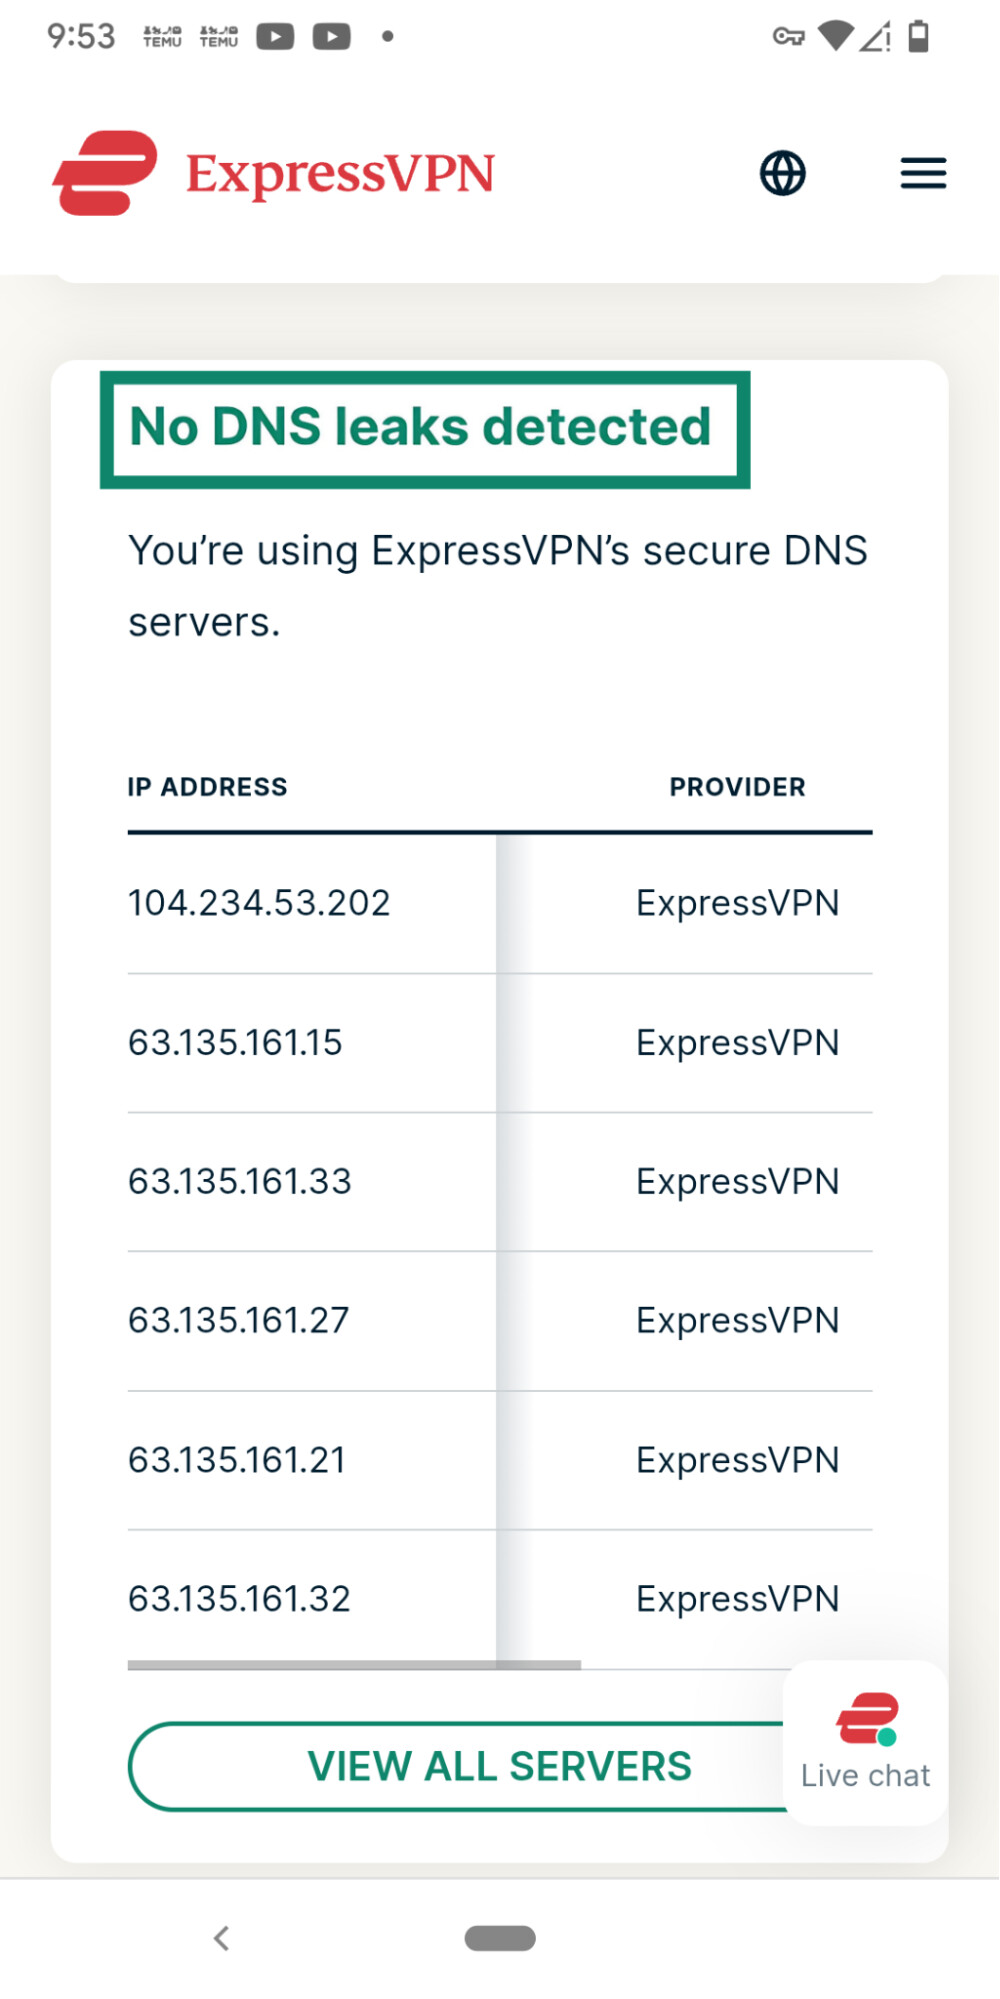
If the test lists only ExpressVPN DNS servers, your browser used ExpressVPN’s DNS for those test requests. If your ISP or another DNS provider appears, check your settings before assuming the VPN is leaking.
What to do if the test shows a leak
If the test lists a DNS provider other than ExpressVPN while you’re connected, work through these checks. Make one change at a time and run the test again after each, so you can see which setting affects the result.
- Update to the latest ExpressVPN app, then disconnect and reconnect to the VPN.
- Turn off your browser’s DoH setting.
- Turn off DNS or web filtering in any antivirus or security apps.
- On Windows, switch DNS back to automatic if you’ve entered a DNS server manually in your network settings.
- Contact ExpressVPN Support if another DNS provider still appears, and include a screenshot of the results, your device and operating system, ExpressVPN app version, and browser.